Lua is a wonderful programming/scripting language that is both lightweight and extensible.
Around five years ago, I wrote a dummy programming language that resembles the syntax of Lua. Back then I did not know anything about Formal Language Theory and I wrote what felt natural to me, later on to discover that what I wrote is called a recursive descent parser (albeit an awful realization of it). Nevertheless, it does resemble Lua, and I was reviewing the code for laughs and possibly modifications, but something struck me as terribly odd, and here it is:
x=1x=3print(x)
Running this code in Lua interpreter prints 3 (while my implementation prints 0–just to show you how bad it is).
What the hell is this? How is that even valid syntax? What does it do? How does it work?
TL;DR: These are three different statements. ALAS! Because Lua has no semicolons, I hear you say, but it’s not that simple, go ahead and fire up your favorite Python interpreter and run the same code… Syntax Error. Still not convinced? Try with JavaScript, still, Syntax Error. So what’s so special about Lua?
If you are not familiar with topics like lexical analysis, parsing and abstract syntax trees, I strongly recommend reading this article and get back here.
Lexical Analysis
Of course that line above wasn’t what struck me, and I didn’t forget to add spaces and was surprised by the result, what surprised me most was this snippet from my lexer implementation (in C):
if (isblank(str[pos])) {
    /* ignore whitespace */
    while (isblank(str[pos])) ++pos;
    return get_token_value();
}
What this does, is silently consume all white space characters (spaces and tabs) and the parser never sees them. This is normal, almost all programming languages do that (apart from ones that use whitespaces for context, such as Python), so it’s not really odd as it seems.
However, it made me curious to immediately check where linefeed (LF) characters ('\n' in most languages, or simply new line) get consumed, the lexer does read and report them as ASCII characters to the parser, but the parser silently ignores them (I won’t show code for that).
Furthermore, the canonical Lua implementation actually consumes linefeed characters during lexical analysis and the parser never sees them.
That means that neither Lua nor my dummy immitation of it require newlines anywhere in the program, there is an optional semicolon support to mark the end of statements, but it’s not required, in fact nothing is required to terminate statements–at all.
The tokens stream generated by the lexer would be as follows:
You can check The Complete Syntax of Lua in EBNF, I’ll use some snippets here (with numbered rules for convenience):
chunk ::= {stat [`;´]} [laststat [`;´]]     (1)
stat ::=  varlist `=´ explist |             (2)
          functioncall                      (3)
          ...
varlist ::= var {`,´ var}                   (4)
var ::=  Name ...                           (5)
explist ::= {exp `,´} exp                   (6)
exp ::=  nil | false | true | Number ...    (7)
Let’s try to parse our code in LL fashion with these rules, all programs start with chunk, and the only token that marks the start of ‘laststat’ is ‘return’, so we definitely would expand to at least one ‘stat’:
You see in the last line, that immediately after the terminal Number (which represents the 1 in x=1), we are back again at expecting a statement.
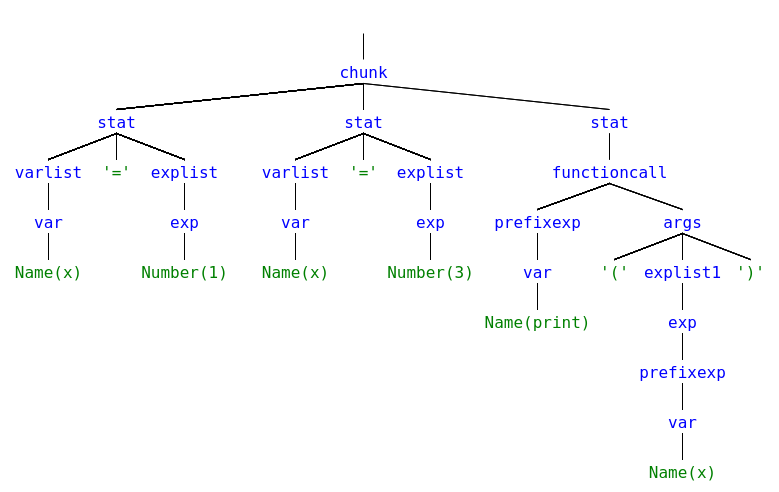
So the generated AST would be:
Or simply, a program consisting of three statements: two assignments followed by a function call.
This doesn’t work in Python (even with semicolon being optional) because all statements in Python grammar are required to terminate with a NEWLINE character.
For JavaScript, the situation is a bit obscure since all EBNF grammar I have found so far would allow the same construction, my assumption is that it fails in a later stage of the compilation. If anyone could point me on why JavaScript doesn’t allow it, feel free to ping me.
You probably studied (or pursued) Computer Organization at some point, you know how hardware works basically, maybe you even tried playing with Arduino or AVR (or even better, ARM). But how does your computer work? what happens when you push that power button?
You probably also heard of BIOS and the magic stuff it does to boot your computer.. but how does it work under the hood? could you write your own BIOS?
That’s exactly what we will do, make our computer do something without the BIOS (i.e. write our BIOS-like thingy).
Prerequisites
Basics of Computer Organization
Basics of Assembly
Using a Linux based distro (if not, you know what you are doing)
nasm and qemu are installed
Power on sequence
When you push the power button, the motherboard powers on the CPU (there is no definitive way of how this occurs, we only concern ourselves with how the CPU sees it).
The processor starts by doing some initialization steps (like choosing the bootstrap processor in a multi-processor setup) and then goes into a known defined state (it wouldn’t make sense otherwise, imagine the processor goes executing code from mars on power up).
To know that state, we should consult the manual of the processor.
For our experiment, the most concerning values are
This means that the processor starts execution in real-address mode from EIP = 0xFFFFFFF0 (the last 16 bytes of 4GB memory).
Q: But how is that possible when the processor can access only 1MB of memory in real-address mode?
A: The processor uses a trick, since in real-address mode segment bases were not yet introduced, the processor always uses the base address
of the segment regardless of the addressing mode. But in real-address mode when you flush any segment selector it sets both the segment selector and the base simultaneously so it would be compliant with real-address mode specifications.
At start up, the code segment selector is 0xF000 just as in older versions of the processor, however, the base is 0xFFFF0000, internally the Bus Interface Unit (BIU) uses the base address of the segment regardless of the currently active mode. This has the irritating effect that if you do a far jump inside the firmware code block, the segment will get flushed and the base address would be lost and you can no longer access the code (unless you jump to protected mode).
For further details on how this works, check out section Processor State After Reset in
Since x86 starts execution from the very last 16 bytes of the very last segment in memory, Qemu requires the BIOS file to be an exact multiple of segment size (64k) and will be loaded in location 0x100000000 - s, where s is the file size in bytes (currently the maximum limit of s in qemu is 8MB, you can check the current value by locating FLASH_MAP_BASE_MIN inside /hw/i386/pc_sysfw.c in qemu source tree).
For example, our nobios BIOS will be exactly one segment, so s = 64k = 0x10000 and hereby will be loaded in memory location 0xFFFF0000
Qemu also aliases the last 128k of memory to 128k below 1MB, so everything between 0xFFFE0000-0xFFFFFFFF will be also accessible through 0xE0000-0xFFFFF.
Qemu has a list of pre-compiled BIOS files listed in some particular directories, to know these directories use the command:
$ qemu-system-i386 -L help
then you can ls these directories and check the files in them.
Simple BIOS
Let’s write the simplest code ever, one that does absolutely nothing.
In theory, the following assembly code would be sufficient
jmp$
However, it still relies on us to get that jmp instruction to be located exactly at 0xFFFFFFF0, and that our flat binary image would be 64kB in size.
Since our file is loaded at 0xFFFF0000, we can fill everything up to 0xFFFFFFF0 with zeros, to do that we use NASM times
; Our file is loaded at 0xFFFF0000, we offset that by 0xFFF0 to get 0xFFFFFFF0times0xFFF0-($-$$)db0; Execution starts herejmp$
We can use the same trick to get the file to 64k in size, by filling it with zeros until it reaches 0x10000
; Our file is loaded at 0xFFFF0000, we offset that by 0xFFF0 to get 0xFFFFFFF0times0xFFF0-($-$$)db0; Execution starts herejmp$; Our file must be exactly 64k in sizetimes0x10000-($-$$)db0
to assemble this file into a (flat) binary image, use the following command
$ nasm -f bin -o bios.bin bios.asm
and to run it, use
$ qemu-system-i386 -bios bios.bin
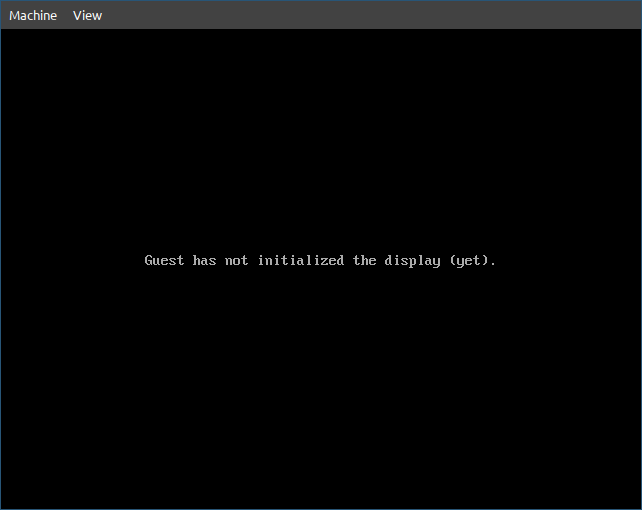
If everything goes well, you should be presented with this
which is great, it didn’t crash, so it must be working. You can try commenting that jmp instruction and loading the file again, qemu will crash with a lovely message (I leave that to your adventurous soul).
Since we will work on this file for a while, let’s be lazy about things.
Let’s create a Makefile so it would be easier for us to assemble and run the file anytime.
NASM:= nasm
QEMU:= qemu-system-i386
OBJ:= nobios.bin
.PHONY:allall:$(OBJ)nobios.bin:nobios.asm$(NASM)-f bin -o$@$<.PHONY:run cleanrun:nobios.bin$(QEMU)-bios$<clean:$(RM)-f$(OBJ)
Then we can assemble and run the file with one command
$ make run
Using UART for output
Our nobios BIOS works, it sends the machine into a blackhole of nothingness, but it would be anti-climax if we don’t make it do something. So let’s show something up, unfortunately, VGA is too hard to initialize for our simple demo, so let’s use something simpler (and a bit more interesting). The original PC was equipped with a UART controller (Intel 8250), which Qemu emulates pretty nicely.
Initializing the UART driver is quite simple, we just identify its port numbers, set some configuration registers and start sending stuff.
Putting it all together
%definefill(x)timesx-($-$$)db0%macroinb1; (port) => returns almovdx,%1; portinal,dx%endmacro%macrooutb2; (port, value)movdx,%1; portmoval,%2; valueoutdx,al%endmacro%definePORT0x3F8uart_init:; Disable all interruptsoutb(PORT+1),0x00; Enable DLAB to set baudrate divisor (base=115200)outb(PORT+3),0x80; Set divisor low byte to 1 outb(PORT+0),0x01; Set divisor high byte to 0outb(PORT+1),0x00; 8 bits, no parity, one stop bitoutb(PORT+3),0x03retuart_putc:inb(PORT+5)andal,0x20jzuart_putcoutbPORT,blretuart_puts:movbl,byte[ds:si]orbl,bljz.donecalluart_putcincsijmpuart_puts.done:ret_start:calluart_initmovax,0xF000movds,axmovsi,msgcalluart_putsjmp$msg:db"Hello, World!",0; Our file is loaded at 0xFFFF0000, we offset that by 0xFFF0 to get 0xFFFFFFF0fill(0xFFF0); Execution starts herejmp0xF000:_start; Our file must be exactly 64k in sizefill(0x10000)
If we run the command
$ make run
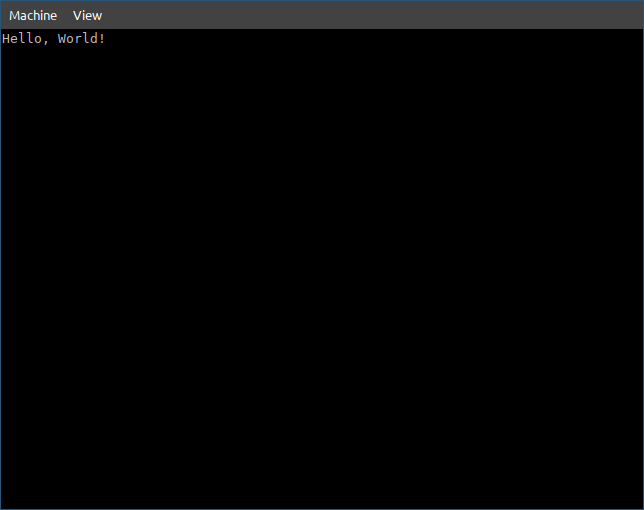
It still shows the same thing, which is OK, we didn’t initialize VGA, to see the serial port output
View > serial0 (or press Ctrl+Alt+3).